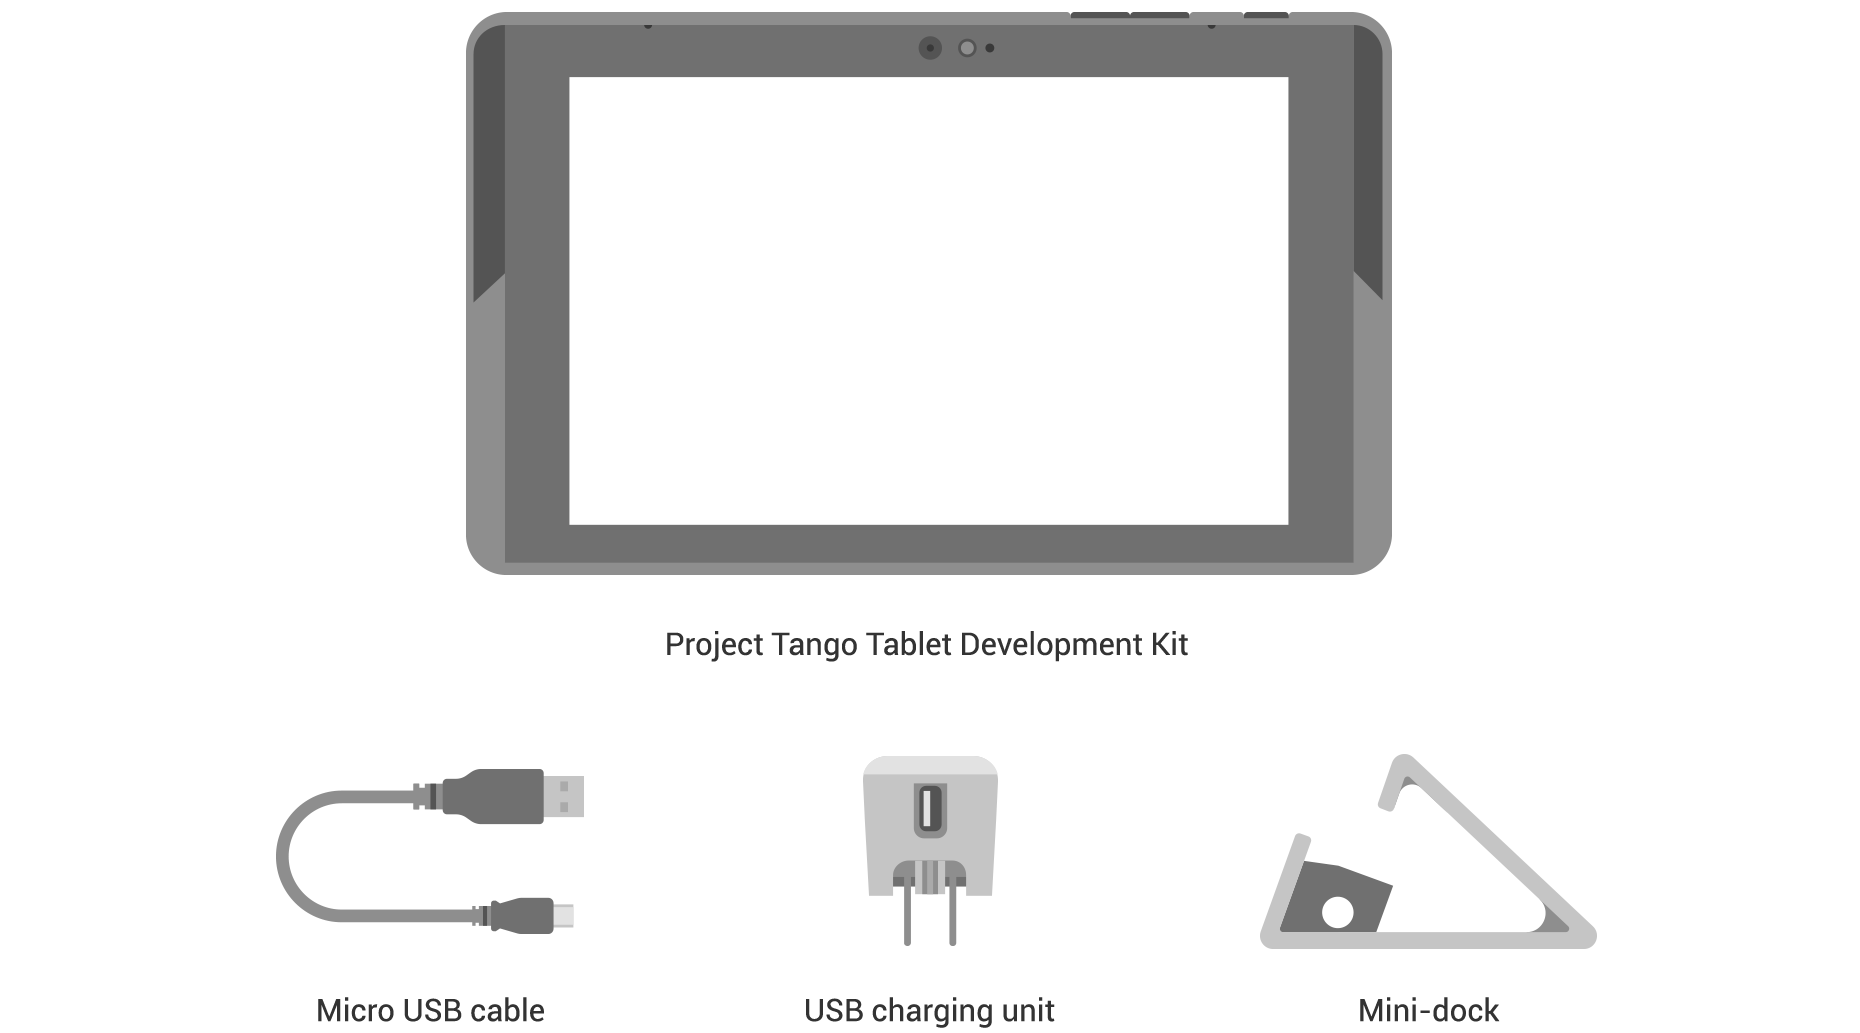
箱の中身
始めよう
Thanks for purchasing the Project Tango Tablet Development Kit! These devices were designed for professional software developers to create new applications. We'd like to remind you that the hardware and software platform are continuing to evolve, so expect frequent updates along the way. We are excited to have you along on this journey.プロジェクトタンゴタブレット開発キットをお買い上げいただきありがとうございます!これらのデバイスは、新しいアプリケーションを作成するために、プロのソフトウェア開発者のために設計された。私たちは、ハードウェアとソフトウェアプラットフォームが進化し続けていることを思い出したので、道に沿って頻繁に更新を期待したいと思います。私たちは、この旅にあなたを一緒に持っていることに興奮している。
Charge the batteryバッテリーを充電
Your battery will not be fully charged when you first unpack your Project Tango Tablet Development Kit. It’s a good idea to fully charge the battery as soon as you get a chance.お使いのバッテリーはありませんあなたが最初にあなたのプロジェクトタンゴタブレット開発キットを解凍する際、完全に充電さ。それはあなたのチャンスを得るように、完全に、すぐにバッテリーを充電することをお勧めします。
Connect the small end of the Micro USB cable to the Micro USB port on the upper left edge of the device, when viewed from the front. Then connect the other end to the charging unit, and the charging unit to a power outlet.正面から見た装置の上部左端、上のマイクロUSBポートにマイクロUSBケーブルの小さい方の端を接続します。その後、電源コンセントに充電部、及び充電部にもう一方の端を接続します。
- Use only the USB charging unit and Micro USB cable that come with your development kit. Using a different charging unit or cable may damage your device. あなたの開発キットに付属してのみ、USB充電ユニットとマイクロUSBケーブルを使用してください。異なる充電器やケーブルを使用すると、デバイスが破損することがあります。
- The input voltage range between the wall outlet and the included USB charging unit is AC 100V–240V. コンセントと付属のUSB充電器の入力電圧範囲は、AC 100V-240Vである。
- We recommend using the charging unit that comes with your device. Other power sources may not work as well. 私たちはあなたのデバイスに付属の充電器を使用することをお勧めします。他の電源は、同様に動作しない場合があります。
- If the development kit is plugged in directly to the computer it will discharge faster than the USB cable can provide power. If connecting to a PC for an extended period of time, we recommend using a high-power 2 amp USB hub or using the mini-dock at the same time. 私たちはあなたのデバイスに付属の充電器を使用することをお勧めします。他の電源は、同様に動作しない場合があります。
- The development kit charges faster when you’re not using it. 私たちはあなたのデバイスに付属の充電器を使用することをお勧めします。他の電源は、同様に動作しない場合があります。
Using the Mini-Dockミニドックの使用
- The USB 3.0 port on the mini-dock is only functional when the tablet is docked. The port can be used to attach an external memory drive or standard peripherals to the tablet. タブレットがドッキングされているときは、ミニドックのUSB 3.0ポートにのみ機能します。ポートは、タブレットに外部メモリドライブまたは標準の周辺機器を取り付けるために使用することができる。
- The mini-dock accepts a power adapter for faster charging (not provided). The power adapter output must be 12V, 2A, and the connector must be a barrel plug with 5.5mm outer diameter, 2.1mm inner diameter, center positive. タブレットがドッキングされているときは、ミニドックのUSB 3.0ポートにのみ機能します。ポートは、タブレットに外部メモリドライブまたは標準の周辺機器を取り付けるために使用することができる。
Set up your development kit開発キットの設定
To turn on your Project Tango Tablet Development Kit, press the Power button on the top right edge for a few seconds, then release it.あなたのプロジェクトタンゴタブレット開発キットをオンにするには、それを解放し、数秒間トップ右端にある電源ボタンを押してください。
When you first turn on your device, you’ll see a Welcome screen. Choose the language you want and touch Start or the Start icon.あなたが最初にあなたのデバイスをオンにすると、ようこそ画面が表示されます。使用する言語及びタッチスタートまたはスタートアイコンを選択します。
When prompted, you can sign in with your Google Account or create one at that time. You can also choose to skip this step and create one later.プロンプトが表示されたら、あなたは、Googleアカウントでログインまたはその時点での1を作成することができます。また、このステップをスキップし、後で1を作成することを選択することができます。
An email address that you use for any of the following counts as a Google Account:あなたはGoogleアカウントとして次のカウントのいずれかの使用するメールアドレス:
- Gmail
- YouTube
- Google Apps
- AdWords
- Any other Google product
When you sign in with a Google Account, all the email, contacts, Calendar events, and other data associated with that account are automatically synced with your device.Googleアカウントでサインインすると、そのアカウントに関連付けられているすべての電子メール、連絡先、カレンダーイベント、およびその他のデータは自動的にデバイスに同期されます。
If you have multiple Google Accounts, you can add others later from Settings > Accounts > Add account.あなたが複数のGoogleアカウントを持っている場合は、後から他の人を追加することができます 設定]> [アカウント]>アカウントを追加。
Stay up to date最新の状態に保つ
The Project Tango Tablet Development Kit receives Over-The-Air (OTA) updates on a regular basis to provide firmware, system, and system application updates. When an OTA update is available, a notification window appears. If you choose to install the OTA update immediately, the process may take up to 10 minutes. The battery must be at least 25% charged to begin the update. We recommend charging the device while the update runs to avoid any interruptions.プロジェクトタンゴタブレット開発キットは、ファームウェア、システム、およびシステム·アプリケーションのアップデートを提供するために、定期的に無線(OTA)アップデートを受け取る。OTAアップデートが利用可能である場合、通知ウィンドウが表示されます。あなたはすぐにOTA更新プログラムをインストールすることを選択した場合、プロセスは最大10分かかる場合があります。バッテリーがアップデートを開始し充電少なくとも25%でなければならない。我々は更新がどんな中断を避けるために、実行中のデバイスを充電することをお勧めします。
If you choose "Install later", you can set a time for the install to occur. A reminder to install the update will remain in the notification drawer, accessible by swiping down on the system bar at the top of the screen. You can also go to Settings > About tablet > System updates to check for an update or install an available update.あなたが「後でインストール」を選択した場合は、発生することが、インストールのための時間を設定することができます。アップデートをインストールするためのリマインダーは、画面上部のシステムバーを下にスワイプすることでアクセス可能な、通知の引き出しに残ります。また、に行くことができ、システムの更新が>タブレットについて> [設定更新のために確認するか、利用可能な更新プログラムをインストールする。
To check the software version that your development kit is running, go to Settings > About tablet > Kernel version to see the build date.あなたの開発キットが動作しているソフトウェアのバージョンを確認するには、に行く タブレット>カーネルのバージョンについて設定]> [ビルド日付を表示するには。
デプスのキャリブレーションテスト
深度センサは、プロジェクトタンゴ開発キットの重要な部分です。深度センサからの入力を理解することは困難です。デバイスの深度センサの習得と機能を知ってもらうためにプロジェクトタンゴタブレット開発キット深度テストを使ってください。
アプリを試そう
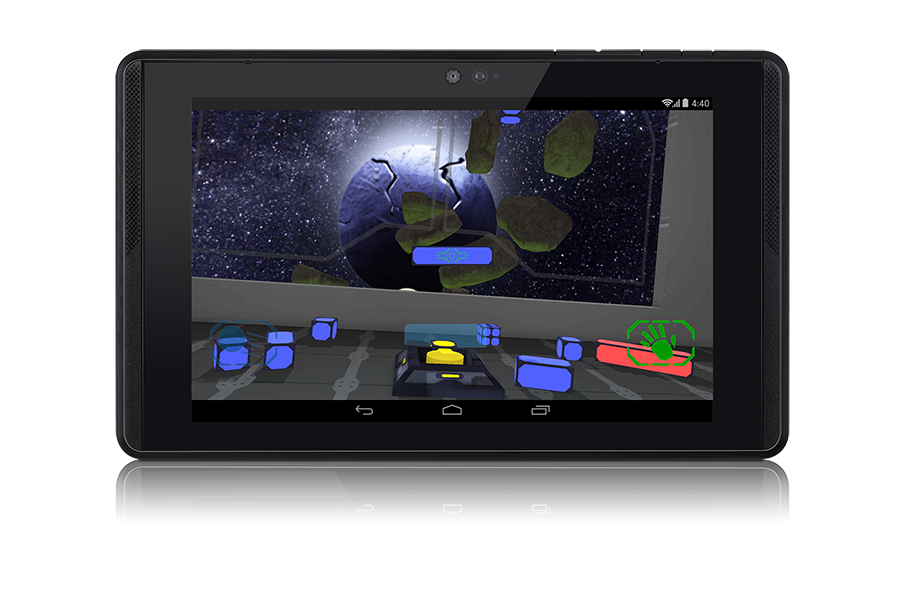
For the best experience, make sure to hold the devices steady for two seconds while the application starts up to prevent drift. Should you experience drift, hold still for a few seconds while the system attempts to recover. The Project Tango system works best in indoor, well-lit environments.最高の経験のために、アプリケーションはドリフトを防ぐために、起動中に2秒間安定したデバイスを保持するようにしてください。システムが回復しようとしているときにドリフトを経験する必要があり、数秒間まだホールド。プロジェクトタンゴシステムは、屋内、明るい環境で最適に動作します。
Visit the Demos page for a list of demos made by the Project Tango team showcasing some of the functionality of Project Tango devices and links to the apps.訪問デモプロジェクトタンゴ·デバイスやアプリへのリンクの機能の一部を紹介するプロジェクトタンゴチームによって作らデモのリストについてのページを。
We hope they serve as inspiration to you to create brand new experiences for Project Tango.我々は、彼らがプロジェクトタンゴのためのブランドの新しい経験を作成するためにあなたにインスピレーションとして機能したいと考えています。
プロジェクトタンゴについての学習を始める
Visit the Developer Overview page to learn more about this website's organization, familiarize yourself with the Project Tango core concepts, and dive into our APIs and SDK.訪問開発の概要、このウェブサイトの組織の詳細については、プロジェクトタンゴの中核となる概念を理解して、そして私たちのAPIやSDKに飛び込むようにページを。
Safety and Regulatory Information安全性および規制に関する情報
Visit the Safety and Regulatory Information page for important information about the device.訪問安全性および規制に関する情報のデバイスに関する重要な情報のページを。
Troubleshooting and support
Close applications for better performanceパフォーマンス向上のためのアプリケーションを終了してください
We recommend closing background applications before running applications using the Project Tango APIs. To close unused applications, open the Recents screen using the button on the right side of the navigation bar and swipe the app thumbnail left or right to remove it. Continue this process until no apps remain.私たちは、プロジェクトタンゴのAPIを使用してアプリケーションを実行する前に、バックグラウンドのアプリケーションを閉じお勧めします。、未使用のアプリケーションを閉じ開くに更新ムービーのナビゲーションバーの右側にあるボタンを使用して画面を、アプリのサムネイル をスワイプすると、左またはそれを削除する権利。何のアプリがなくなるまで、このプロセスを続行します。
Support
Still have hardware-related issues? Contact us at project-tango-hardware-support@google.com for assistance.それでもハードウェア関連の問題がありますか?までご連絡 project-tango-hardware-support@google.com支援。
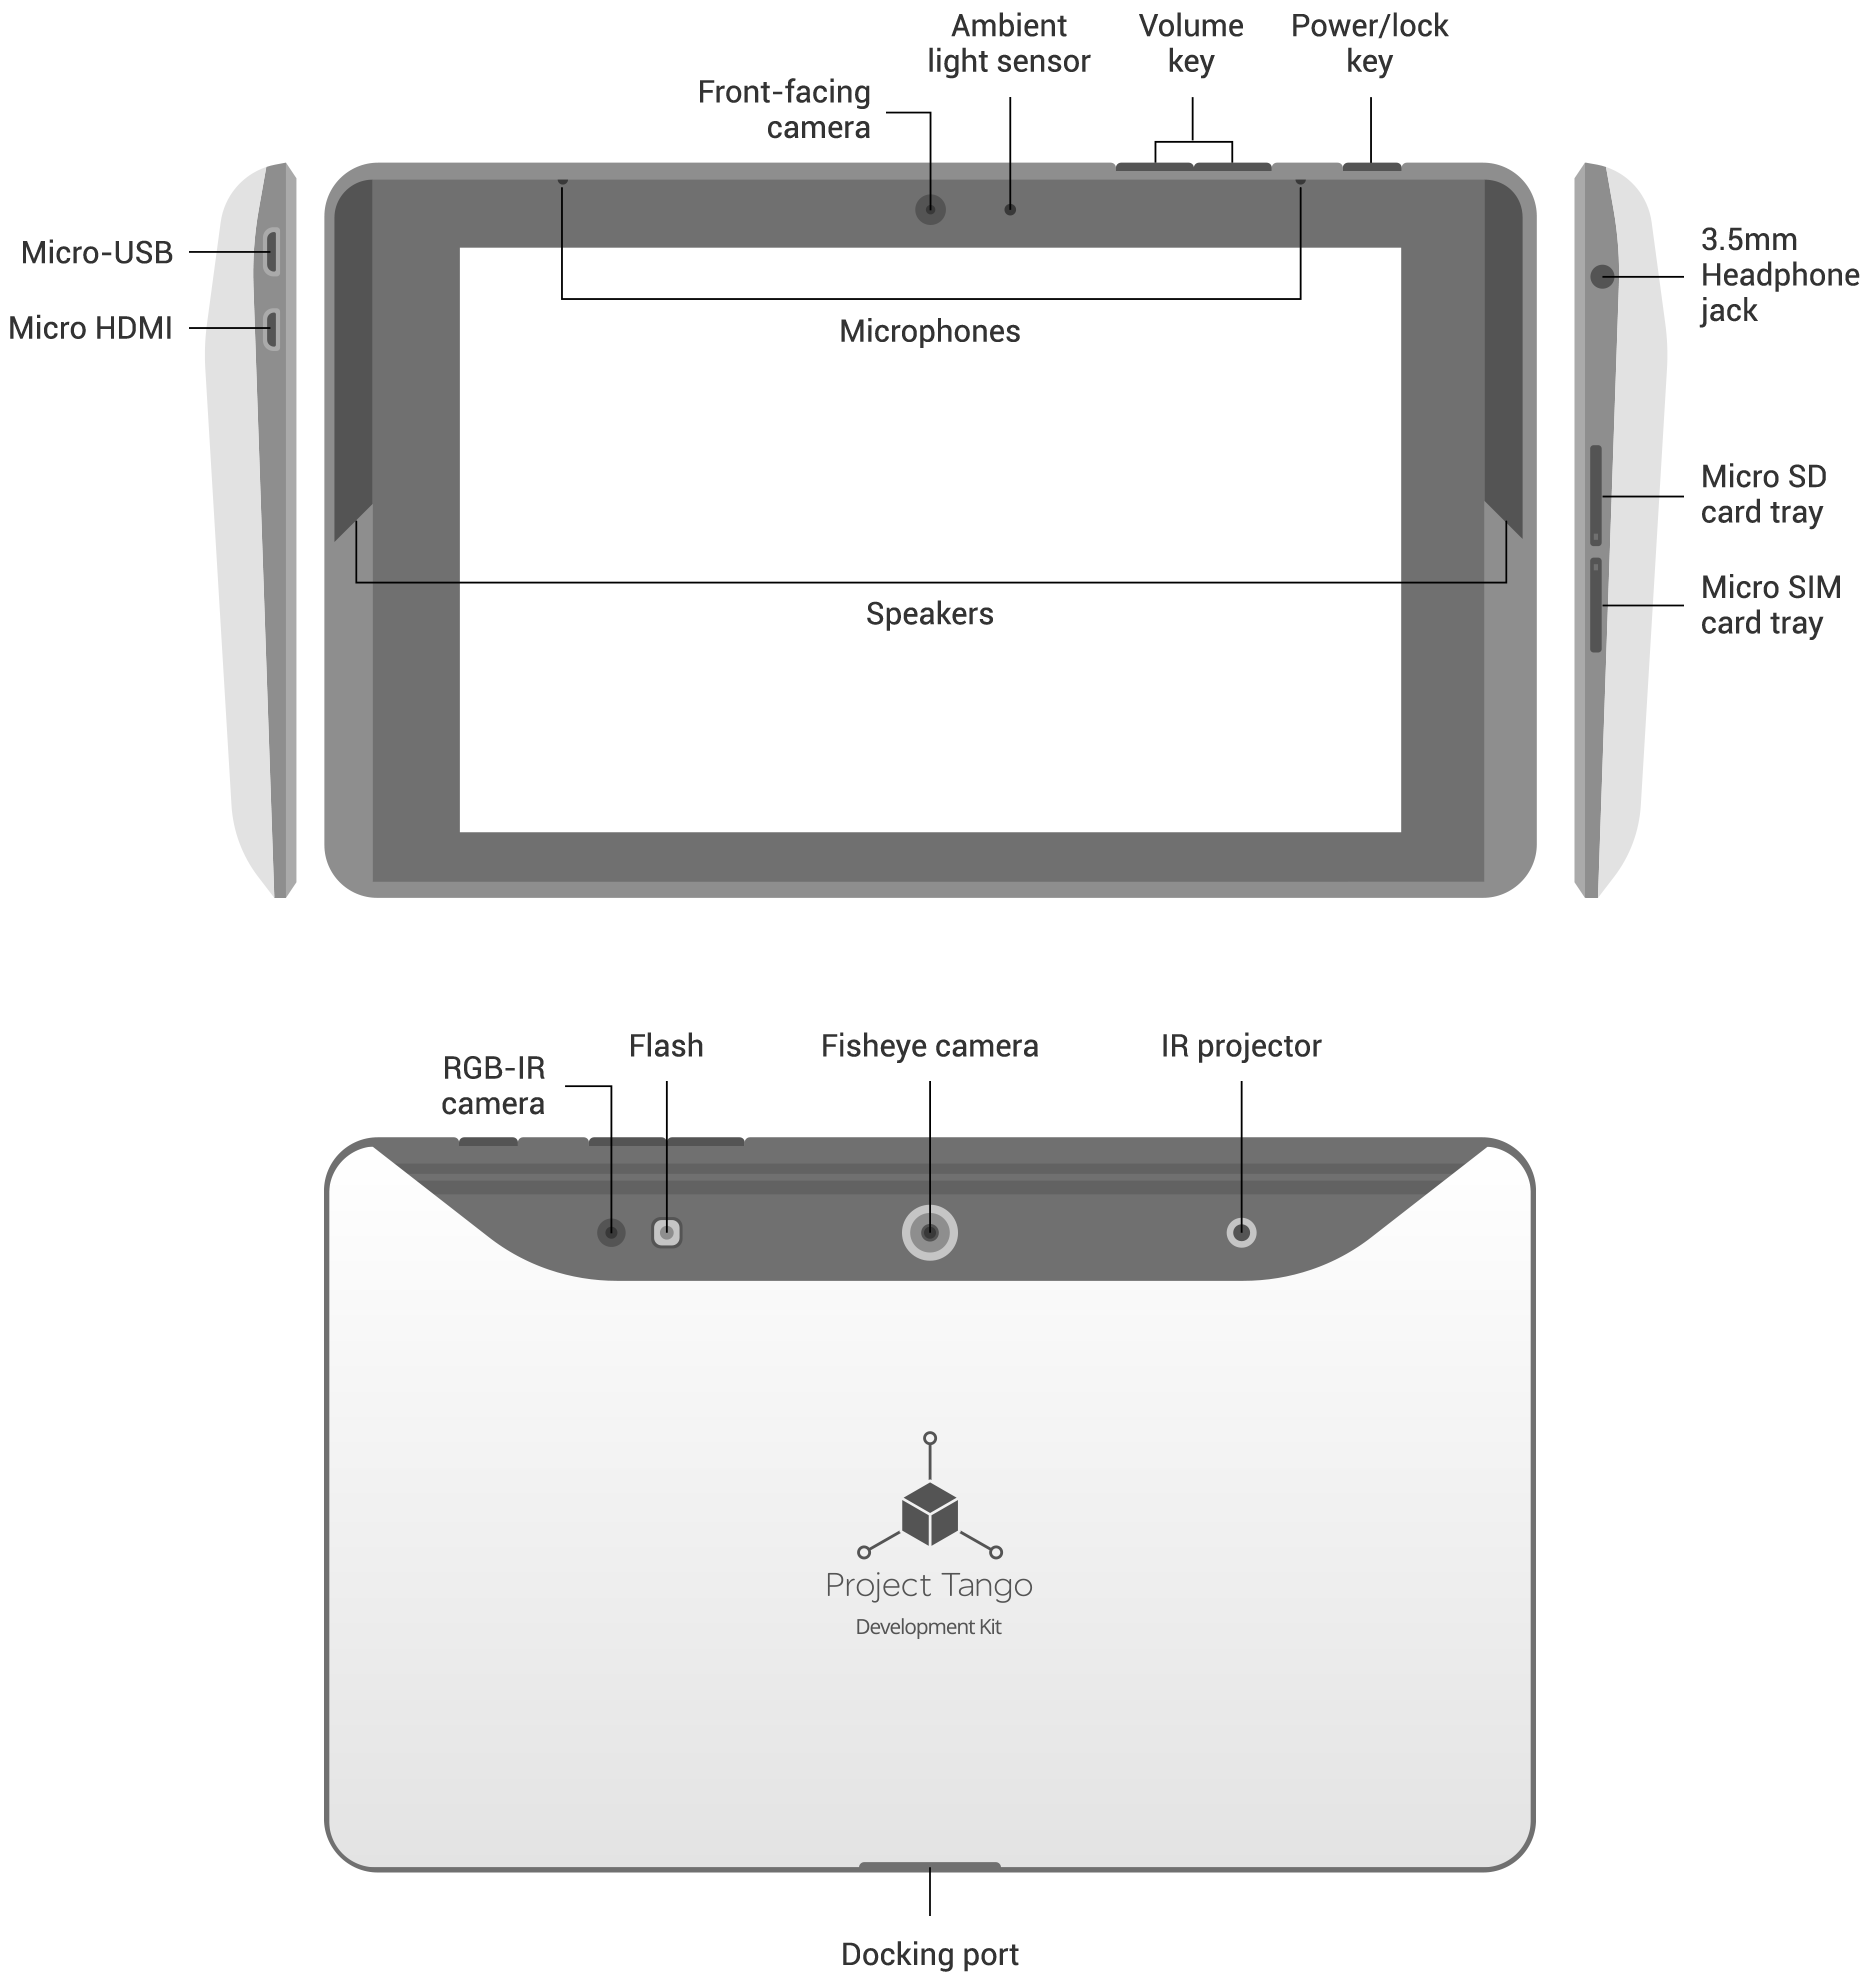
Project Tango Tablet Development Kit hardware
Technical specifications技術仕様
スクリーン
- 7.02インチ1920×1200 HD IPSディスプレイ(323 PPI)
- 傷のつきにくいCorning® ガラス
大きさ
- 119.77 x 196.33 x 15.36mm
重さ
- 0.82 lbs (370 g)
カメラ
- 4 MP 2µm RGB-IR pixel sensor
- 1 MP 前面, 固定焦点
OS
- Android™ 4.4 KitKat®
Wireless
- 4G LTE
- Dual-band Wi-Fi (2.4GHz/5GHz) WiFi 802.11 a/b/g/n
- NFC (reader and peer to peer modes)
Audio Output
- デュアルステレオスピーカー
- 3.5mmオーディオコネクタ(OMTP規格)
Memory
- 128ギガバイトの内蔵ストレージ(実際にフォーマットされた容量は少なくなります)
- 4 GB RAM
Ports
- Micro HDMI
- USB 3.0 host via dock connector
- Micro SD card
- Nano SIM slot
Battery
- 4960 mAH cell (2x 2480 cells)
Processor
- NVIDIA Tegra K1 w/ 192 CUDA cores
Sensors
- Motion tracking camera
- 3D depth sensing
- Accelerometer
- Ambient light
- Barometer
- Compass
- GPS
- Gyroscope
認証
- North America: FCC/IC, CEC BCS, UL, PTCRB
- Worldwide: CE, CB, GCF, GCF FT
- Battery: UL, UN, CB, CE
- Adaptor: UL/ULc, CB